Wednesday, June 27, 2012

Exciting news

Once again my apologies for not regularly updating the blog. Insert excuse here.

What I am excited to be able to help announce is that I have been working on a super secret project over the last few weeks with The Sound of Machines http://www.facebook.com/thesoundofmachinescommissionpainting


This is the big thing we've been working on in secret for weeks now 


http://www.indiegogo.com/thesoundofmachines


Please check it out and contribute!!!

Saturday, April 21, 2012

Hi all!

I've been wanting to write an article on the concept and tactics of staying in combat for some time, and numerous night shifts have given me the time to do so..

I play a number of 40k armies - marines of many colours, tau, eldar, necrons etc... But by far I enjoy playing my guard the most. I run a mech-hybrid psyker list (you'll see two of my recent games vs Kirby's blood angels on here) and vs assault armies, it can be pretty devastating. At Cancon this year I was in first place for battle points right up until the last game, where I played a space wolf Logan/longfang/pod support list.

Having a little chuckle, my chimeras advanced up the field, blasted half his force away, killed his priest, and dropped the leadership of his wolf guard to ld 4.

Logan then single handedly won the kill point mission.

His wolf guard passed their leadership, with a reroll from Logan being close by, and then proceeded to stay locked in combat with my infantry/tanks for the remainder of the game...

So how does this happen? I know many people understand if I am in combat I can't get shot at - but I don't generally see people applying this as well as they could.

Firstly, the concept. Damage results vs a vehicle do not count for combat resolution, with the exception for walkers. Using the Logan example, my opponent after attaching Logan, put his highness as far back as he could, brought his fists/hammers into combat with my chimera, and his standard/non power weapon guy into combat with my command squad.


Importantly, anyone that my squad could reach in combat with counter-charging was also in combat with my chimera. My guardsmen punched them, he punched my chimera, and we drew combat. Consolidate, then kills my veterans in the following turn, netting another consolidate move, and a further move/assault/rinse/repeat. Note the meltagun in the wolves squad would not shoot at the chimera, since the point is to assault the vehicle.

This is the basics. Squad can't be shot, since locked in combat. But how else can this be achieved?
A second example from a friendly game, where an opponent did the following using an independent character to pull his punches.


The inquisiton squad is just in range of the veteran guardsmen – note the position of the independent character (coteaz in this case). The inquisition assault, the guardsmen cannot reach the character, and though the inquisition unit maintains coherency, without counting coteaz the inquisition models are not within 2 inches of a model in combat. Alternatively, if you used an independent character that wouldn't win combat by himself, it would not matter if the guard could reach him – as the crusader and death cults could not fight either way (they need to be within 2 inches of a member of their unit who is in base to base). This is a very simple method for pulling your punches – as the unit can draw the combat, and wrap in to wipe out the guard in the guard turn.

This may be basic for many veteran players... But I still don't see it happening even in fairly competitive levels of play. Consider the many other ways you can do this - whenever possible, hit vehicle and infantry, pulling your punches. Consider jump infantry, with the ability to do this 18 inches from the centre. Focus on stunning/immobilising your opponents vehicles so you can access areas in your opponents deployment where you can not be targeted. Consider your opponents ability to counter attack.

Pulling punches correctly, particularly versing armies like my pride and joy guard with little counter attack ability, will win you games - you just have to work out the best method of doing so!

Thursday, April 5, 2012

CoA List building

Building a tournament legal 1000 point Covenant of Antarctica Naval List

Large


In my opinion this is where the majority of our damage output lives. The combination of high strength broadsides and turret (guns) combined with Sterginium rounds  means Large CoA vessels put out some of the best, difficult to mitigate, damage output compared to anyone else.

The weapons on the large ships are also effective against all different enemy vessels with the only possible exception being enemy corvettes.

So that brings me to the first major decision. What large vessels do you take. The dreadnought is awesome and I can not fault it (despite being the most expensive squadron I have seen in the game but i think that is justifiable). In 1000 points though I am going to have to pass on it in order to take two Battleships instead.

The damage output on the Battleship is very comparable to the dreadnought. Its main advantage though is that a pair of them outputs significantly more firepower (I know they cost more). I cannot justify spending 460 points on 1 of each in 1000 points. However I can easily take 370 points in two battleships.

With the battleships the utility value of wave lurker and the extra 2" move it gains from that are very handy for avoiding damage and closing into range.

The Time orb is also an essential large squadron in most CoA lists. The threat of teleportation alone is worth the 70 points even if you dont use it. More importantly though the Time Dilation Field that reduces the incoming AD from your opponents is indispensable. Especially in games where you want to close with the enemy.

Medium

Given that points for points none of the medium ships (or fliers) output the same order of magnitude of firepower as our large and massive squadrons, I have abandoned the idea of selecting mediums primarily on firepower. If you find yourself taking mediums for damage output then I would recommend dropping them and trying to fit something larger.

Based on the fact that most of the core missions involve victory points I take the Zeno Armored Cruisers (usually a pair). For 25 points more than a Plato Cruiser you get inventive scientists, 2 extra CR and HP.

These stats bonuses equate to your enemy having to get TWICE as many (24) successful AD against the Zeno compared to the Plato (12).

The higher CR means they tend to take damage more slowly meaning their firepower drops off less during the game. The two extra HP also give you more opportunity to play a repair card on the squadron if using them.

For these reasons I take a pair of Zeno cruisers. The broadsides are really nice for providing versatile damage output. The particle accelerator can nicely damage a medium ship and then follow through on a small one behind it, or alternatvily with reasonable alignment, (which I admit is tricky against a good opponent) two small ships. The points denial value is where these models shine though.

Small

My advice is to go with Frigates. They are fast, cheap and have reasonable damage that is easy to use.


The real advantage of Frigates though is 2 AP. CoA is not a boarding army. AP though is a critical resource and frigates are the most cost effective way to boost it.

You are unlikely to actually capture enemy vessels unless you get lucky but you can preemptively board to reduce their AP and get in the way.

Frigates are disposable. Use a screen of frigates to prevent your opponent getting close enough to board you. Throw one right in front of their big stuff to lock down their movement.

Destroyers are good (I have revised my 'do not take' status I assigned to them in my post on CoA small), however, they have no real advantages in my list over Frigates.

The Fore Guns on the Destroyer are easier to use and Pack Hunter means that they can lay down some serious damage. The problem is that unless you are attacking large things the extra firepower is largely overkill. My big vessels take out large enemy vessels fine, I dont feel the need to invest more points into fufilling this role.

Frigates on the other hand are just as effective at taking out small enemy vessels and cost 10 points less.

My main problem with corvettes is that they are less durable than the other smalls with the CR 4 and the fixed channel guns are more fiddly to use while outputting less firepower (broadsides get to shoot out both sides). Yes they are faster but I have not yet encountered a need to be faster than the Frigates already are.


The message is:
  • Damage comes from big things
  • Everything else provides utility or tactical/strategic options...any damage you get from them is a bonus
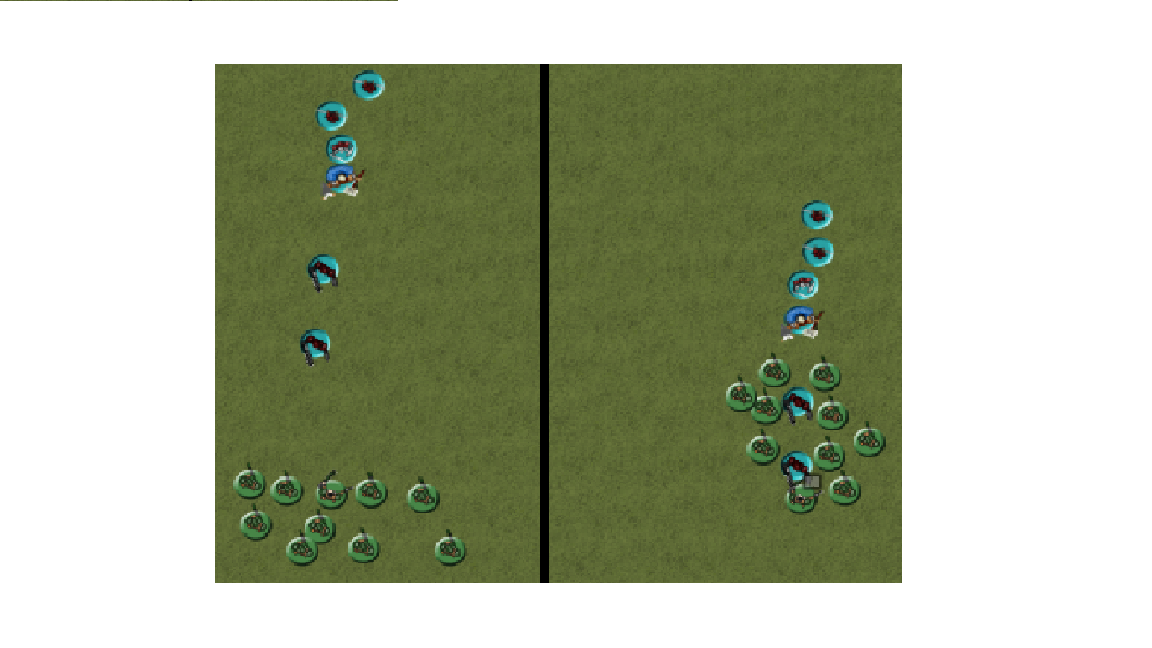
Sample list

2x Battleships
1x Time Orb
2x Armored Cruisers
3x escorts
3x escorts
4x frigates
3x frigates
2x frigates

Total 995 points

That is 9 activations per turn (including your two from tiny fliers) which seems to be enough to not get too badly out maneuvered  in 1000 points. I have yet to have significant difficulty destroying anything that I focus on and can avoid losing models that I need.

Saturday, March 31, 2012

Recent CoA experience

Apologies for the lack of recent posts. Unfortunately life gets in the way of Hobby sometimes.

Aside from recently finishing off my 6 destroyers and another batch of frigates I have been playing some games using the new 1.1 Dystopian Wars rulebook.

I love the new rulebook...but I'm going to save that for another post. For now I want to talk about some game experiences.

I have been running in a 1000 points a core of:

2x Aristotle Battleships
2x Zeno Armored Cruisers
2x 3 Galen Escorts
1x Callimachus Time Orb

and been fiddling around with frigates, destroyers and corvettes (and more escorts for the orb).

So far it has been working really well. One of the real advantages is the compression of applicable force. Each of my major activations (medium and up) lets me unleash very large amounts of firepower in a single activation. Another time I will post some thoughts on how to build a list to take advantage of this and balance it with volume of activations.

Against armies that you want to get in close against:

  1. The Callimachus Time Orb activates first and uses the Time Dilation Template to protect the Battleships which are submerged
  2. Tiny fliers and small vessels activate
  3. Last 2 activations are the Battleships moving forward 10 (8" submerged + 2" for the Time Dilation)
Next turn the orb moves forward and provides the same trick to the Battleships. This time when the battle ships activate though they tend to surface and begin merrily blasting away at my target priorities.

That is just the general game plan against armies where I want to get closer. The advantage being that the only things that get full shots against the Battleships is any number of squadrons my opponent has more than me plus up to two extra (one if he goes first and another if he goes first in the second turn before the orb rinses and repeats.

You also have the opportunity for opportunistic teleportation but beware as this more often than not leaves you very vulnerable. 

I find that the Zeno Armored Cruisers soak up a massive amount of damage. That higher Critical Rating and starting Hull Points mean that it takes very considerable firepower to destroy them.

I find that the Plato Cruiser doesn't put out significant firepower. Given this I would rather for the extra points be hard to kill. The particle accelerator tends to KO little ships and the broadsides are nice and beefy on the Zeno.

As far as little ships go I have not made up my mind 100%
I have reassessed my previous position about Plutarch Destroyers not being worth considering. I have used them very effectively in two games. I just am not yet convinced that they output the correct amount of fire for their points when compared to Frigates.

At present I am leaning towards using the Diogenes Frigate as my main small ship. Being cheaper and therefore more numerous than Destroyers in my list I find they put out good firepower at short range.

Being disposable I use them to block enemy assaults. By placing a screen of Frigates more than 4" out from your larger vessels you can prevent larger (therefore less maneuverable) enemy vessels from closing into boarding range. They usually also end up targeting small enemy vessels leaving my big ships to focus on theirs. As such I tend to run them in small squadrons to increase my number of activations per turn.

Since the Diogenes Frigate has broadsides this means they can zip out from behind your battleship, form a screen and then give a nasty broadside to anything trying to close with you.

Galan Escorts have been amazing. They neutralize the effect of rockets and torpedoes on my big ships and can double in to the role of screening that frigates do in a pinch. The extra AA against boarders also can mean the difference between a win and a lose. They really force you opponent to dedicate significant resources to eliminating them in order to attack your Battleships.
 

Monday, January 30, 2012

Ptolemy Class Bombers Completed

Finished off the bombers today. I was really glad to get some dull coat on them as they chip really easily without it.

Also there is now a facebook page: http://www.facebook.com/HobbyOrDie

Painting guide:

Sunday, January 29, 2012

CoA Small Class Naval Unit Analysis and Tactics

So in my opinion this is definitely our weakest class with relatively difficult to use options. The main reason I say this is due to their limited range and firing arcs. I will try to keep this article up to date with my views and any rule changes.

Overall I think minimizing the number of small squadrons is a mistake. There are a few common reasons to take several squadrons such as:
  • Increased number of activations per turn. This reduces the extent to which your opponent gets multiple activations after you have activated all of your Squadrons. Additionally this lets you make 'inconsequential' moves while waiting for your opponent to commit or come into range.
  • Protection for larger ships from small/medium class models by obstructing line of sight
Compared to their cost other factions small ships generally do everything better than ours except for movement. Our movement is faster but this means that either you waste this advantage by holding back to provide support for slower larger vessels or you run up, do a suicide run and get blasted apart next turn.


Saturday, January 28, 2012

Cancon - Day 2!

Hi all - 3 more games and still doing well.

Game 1 - Multiple objectives and Hold the centre for the secondary, Pitched Battle. Honoured to verse Crynn from Melbourne!

Crynn was using Grey Knights - roughly had a Grand Master, Coteaz, 10x tooled up paladins, 10x strike knights, landraider godhammer with psyammo, venerable psyflemen, deathcults with a mystic and acolyte or so, thats the gist of it. He rolled high on scoring, so every unit ended up being scoring that could be.

He had first turn, and moved his landraider to shoot down my vendetta - that had been carefully pinned in place to avoid flat out moves in the scout phase. Unfortunately for Crynn, he failed to penetrate, which would cost him a lot. His psyflemen shot at my manticore in cover, doing a glance and a pen, both being saved. I think he ran forward with all his paladins etc, but had pretty shocking movements/runs on the whole.

My first turn I think blew off one lascannon from the landraider, via the manticore. Both my hydras shot his Venerable Dread, and blew off an autocannon arm. I think the vendetta killed one paladin with lascannon fire.